Friday, May 27, 2011

Homemade Peanut Butter

As much as I love peanut butter, I had never even thought about making it from scratch until recently. Peanut butter seems like one of those grocery staples you just buy. However after a quick gander at various peanut butter recipes, I quickly realized that there's nothing to making it at all. This recipe requires hardly any ingredients and minimal work, assuming you buy the peanuts sans shell. Trust me, shelling a bag of peanuts to save a couple of dollars is most definitely not worth the time and sore fingers. I usually make more than the recipe below and simply add one tablespoon of oil per cup of shelled peanuts.


Ingredients
1 cup of peanuts, shelled, unsalted and roasted (highly recommend buying in this form)
1 tablespoon peanut oil
Sea salt to taste
Honey to taste

Directions
Combine peanuts and peanut oil in food processor. Don't add more oil if you don't see the peanuts break down right away as it will take a couple of minutes for the peanuts to break down and soften with the oil. If you want your peanut butter chunky, don't allow the substance to break down completely.

Once you achieve your desired texture, it's time to perfect the taste. Add salt and honey in small amounts  until you achieve your desired taste. Make sure to taste the mixture prior to adding any salt or honey to avoid over-salting. Remember, you can always add more so stay on the conservative side.

Spread on anything and everything and enjoy! My favorite is on a warm piece of toast as shown in the picture below. I would recommend storing it in the fridge and using within a month, however I have yet to keep it around any longer than that to see how long it really lasts!


Thursday, April 28, 2011

Blue Ribbon Carrot Cake with Cream Cheese Icing

I don't have much to say about this recipe other than I have VERY high standards for carrot cake and this one is among the best I've tasted. I like my carrot cake dense, moist and smothered with cream cheese frosting. In my opinion, carrot cake tastes best served chilled. I made this cake a few weeks ago for Jory's birthday and enjoyed it with every single meal that birthday weekend, whoops. There's nothing better than a cold piece of carrot cake with a hot cup of coffee on a Saturday morning. YUM!


Ingredients
2 cups flour
1/2 teaspoon salt
2 teaspoons baking soda
2 teaspoons cinnamon
3 eggs, beaten well
3/4 cup buttermilk
2 teaspoons vanilla extract
2 cups grated carrots
1 cup chopped walnuts
3/4 cup vegetable oil
2 cups sugar
1 (8 ounce) can crushed pineapple, drained well
1/2 cup coconut flakes

Directions
Combine the flour, salt, baking soda and ground cinnamon and set aside. In a separate bowl, combine the eggs, oil, buttermilk, sugar and vanilla and beat until smooth. Stir in the flour mixture, pineapple, carrots, coconut flakes and walnuts.

Pout into two greased and floured 9-inch cake pans. I grease each pan then put parchment paper rounds in the bottom of each. Pour half of the batter into each pan and bake in a 350 degree oven for 35-40 minutes, or until a toothpick comes cleanly out of the center of the cake. Carefully remove the parchment paper from the bottoms of each cake layer, let cool and top with cream cheese icing.


Cream Cheese Icing
8 ounces cream cheese at room temperature
3 tablespoons butter at room temperature
2 tablespoons of milk (if needed)
1 teaspoon vanilla
1 pound powdered sugar

Mix all ingredients together, adjusting ingredient amounts until desired consistency is achieved.

This recipe is originally titled Julie Treacy's Blue Ribbon Carrot Cake, passed along by my amazing friend and baker, Kelsey Bulat.

Cake Balls

This funky little dessert is taking the world by storm. You have probably seen or heard of these cute little guys, maybe even tried a few, but are you aware of how simple they are to make? The best part about these spherical pieces of heaven is that they taste exactly like cake batter. The only thing better than dessert is raw dessert, including cookie dough, cake batter and my all time favorite, brownie batter. For those of you that love the amazingness that is raw baked goods but can't stomach the raw eggs, this is your chance to enjoy that flavor without hesitation! Next time you need a fun and simple dessert, pick up just three ingredients and give these a try. Enjoy!


Ingredients
1 (18.25 ounce) package cake mix
1 (16 ounce) container prepared cake frosting
6 ounces of flavored confectioners coating disks or bar (almond bark)
Food coloring (optional)

Directions
Prepare the cake mix according to the directions on the box. When cake is finished baking, allow to cool for 30 minutes. Crumble the cake into a large bowl using a stand mixer or hand mixer. Add the frosting and mix until well combined. Place the bowl in the refrigerator for at least 3 hours or overnight. I recommend overnight as the colder the mixture is, the easier it is to handle.

Line a baking tray with wax paper. Use a melon baller as a scooper to form balls with the cake mixture. Place on wax paper. Once you have used all of the cake mixture, place the baking tray in the freezer for at least one hour. Melt the almond bark in a glass bowl of the microwave, stirring every 5-10 seconds until smooth. At this point you can add a bit of food coloring if you are using white chocolate and want to add some color.

Remove the balls from the freezer and roll them tightly with your hands to make them perfectly round. 

Roll the balls in the melted almond bark and lay on the wax paper to harden. Store in the freezer until ready to serve, they won't freeze but taste best when nice and cold.

I made this batch with vanilla cake mix, vanilla cream cheese frosting and vanilla almond bark coating, however the possibilities are endless! Next on my list is caramel cake balls with a salty dark chocolate coating.


Saturday, April 2, 2011

Blueberry Coffee Cake

No big breakfast is complete without a little something sweet to finish. It couldn't get any easier than this simple coffee cake, so give it a try and make your guests think you worked way harder than you really did. I won't tell if you don't.


Ingredients
1 1/2 cup white sugar
1/2 cup butter, room temperature
2 eggs, room temperature
1 cup milk
1 teaspoon almond extract
1 teaspoon salt
4 cups flour
4 teaspoons baking powder
3 cups fresh blueberries

Directions
Preheat your oven to 375F.

Mix together the first five ingredients with an electric mixer. In a separate bowl, mix together the salt, flour and baking powder. Slowly dump the flour mixture into your electric mixer on low speed until incorporated.

Rinse your blueberries with water and toss with a sprinkle of flour. This will keep your blueberries from sinking to the bottom of your pan in the oven. By hand, fold the blueberries into the batter.

Spoon the thick batter into a 16-cup bundt pan (or casserole dish) and pop in the oven for 45-55 minutes until browned and no longer doughy.


Let cool for about a half hour, flip upside down on a cake stand and adorn with your favorite glaze or topping. We served this with our strawberry butter, but no spread is necessary with this tasty treat.


This recipe comes from my amazing friend and baker, Kelsey Bulat.

Sunday, March 27, 2011

Sunday Brunch

Some think of football, I think of brunch. When Sunday rolls around each week, nothing beats a hot cup of coffee, a runny egg yolk and a little something sweet. While I've always enjoyed breakfast, my true love began after experiencing Sunday breakfast at The Cafe, one my all time favorite restaurants. Throughout college, Sunday breakfast at The Cafe became tradition whether it was just Jory and I or whatever family happened to be in town from that weekend's track meet.

In honor of the good old days, we jogged our memory this morning with a little homemade brunch. This menu included eggs benedict on homemade english muffins, blueberry coffee cake with strawberry butter and fresh fruit salad with orange glaze. More recipes from this successful brunch to come!


Homemade English Muffins

Ingredients
1 1/4 cups lukewarm water
4 cups bread flour
2 1/2 teaspoons instant yeast
1/2 teaspoon baking soda
1 1/2 teaspoons salt
2 egg whites
fine cornmeal

Directions
In a large bowl, mix the water, yeast, baking soda, salt and two cups of the flour. Mix until a wet paste is formed and set aside for about five minutes. In the meantime, beat the egg whites with an electric mixer until stiff peaks are formed then fold into the batter mixture. Add the remaining flour, 1/4 cup at a time. Once the dough becomes too difficult to mix in the bowl, dump onto a floured surface and mix with your hands. Knead for a few minutes or until the mixture forms a smooth ball of dough. Put the dough ball into a clean bowl with a bit of oil, making sure all sides are coated. Cover and let rest for about an hour.

Place dough on floured surface and roll until 1/2 inch thick. Cut out circles with a round cookie cutter or glass, cover with cornmeal and set aside. Let the rounds rest for 30-45 minutes.


About five minutes before you are ready to start cooking your muffins, turn on an electric griddle to 350 or medium heat. Once heated, add a tablespoon of butter and toss in your muffins to fry. Flip the muffins every four minutes for a total of sixteen minutes. Let cool for a few minutes and enjoy while warm!


This recipe was found on CookingBread.com.


Strawberry Butter
I stole this idea from Ina Garten. There's really no need for a recipe or instructions, but you MUST try this on these homemade english muffins.

Ingredients
Strawberry fruit preserves, room temperature
Butter, room temperature

Directions
Mix together with an electric mixer, spread and enjoy!


Wednesday, March 16, 2011

Bailey's Irish Cream Cupcakes

First off, I must confess that I used O'Reilly's Irish Cream but left the title as is simply because it sounds better. If you are an Irish cream snob, then go ahead and spend 30 dollars. I'll spend ten and enjoy it just the same. Trust me, these cupcakes are amazing regardless!

It's been a while since I've baked, but I decided a holiday is as good of an excuse as any to indulge in something sweet. I came across this recipe yesterday and just had to try it for myself. As a very experienced batter consumer, I'm telling you that this is one of the smoothest, most delicious batters I've ever had. Enjoy a cold glass, or more, of something Irish in honor of this wonderful holiday and give these cupcakes a try. Happy St. Patty's Day!


Bailey's Irish Cream Cupcakes
Ingredients
2/3 cup unsalted butter
2 cups sugar
2 large eggs, room temperature
2 teaspoons vanilla extract
1 1/3 cup Bailey's Irish Cream
2/3 cup water
2 tablespoons milk
4 cups all-purpose flour
2 teaspoons baking powder
2 teaspoons salt

Directions
Preheat the oven to 325 degrees. In a large bowl, cream together butter and sugar until fluffy, about 2-3 minutes with a stand mixer. Add eggs and vanilla and beat well. In a separate bowl, combine the Bailey's, water and milk. Mix well. In yet another bowl, combine the flour, baking powder and salt. Add the flour mixture to the creamed mixture, alternating with the Bailey's mixture. Beat on medium speed for about two minutes. Fill cupcake liners 3/4 full and bake for 25-30 minutes or until tops spring back when lightly touched. Allow to cool completely before frosting.


While most of the Bailey's flavor baked off in the batter, the taste definitely comes out in this amazing buttercream icing.

Bailey's Irish Cream Buttercream Frosting
Ingredients
1 stick unsalted butter, room temperature
3 cups powdered sugar
2 tablespoons, maybe more, of Bailey's

Directions
Cream the butter on high speed for 2-3 minutes, add the Baileys and mix thoroughly. Slowly add the powdered sugar until well blended. I continued to add powdered sugar and Bailey's until I found the right consistency. Frost the cupcakes and top with green sprinkles for a little extra glam. Enjoy!

This recipe was found on Cupcake Rehab.

Sunday, February 27, 2011

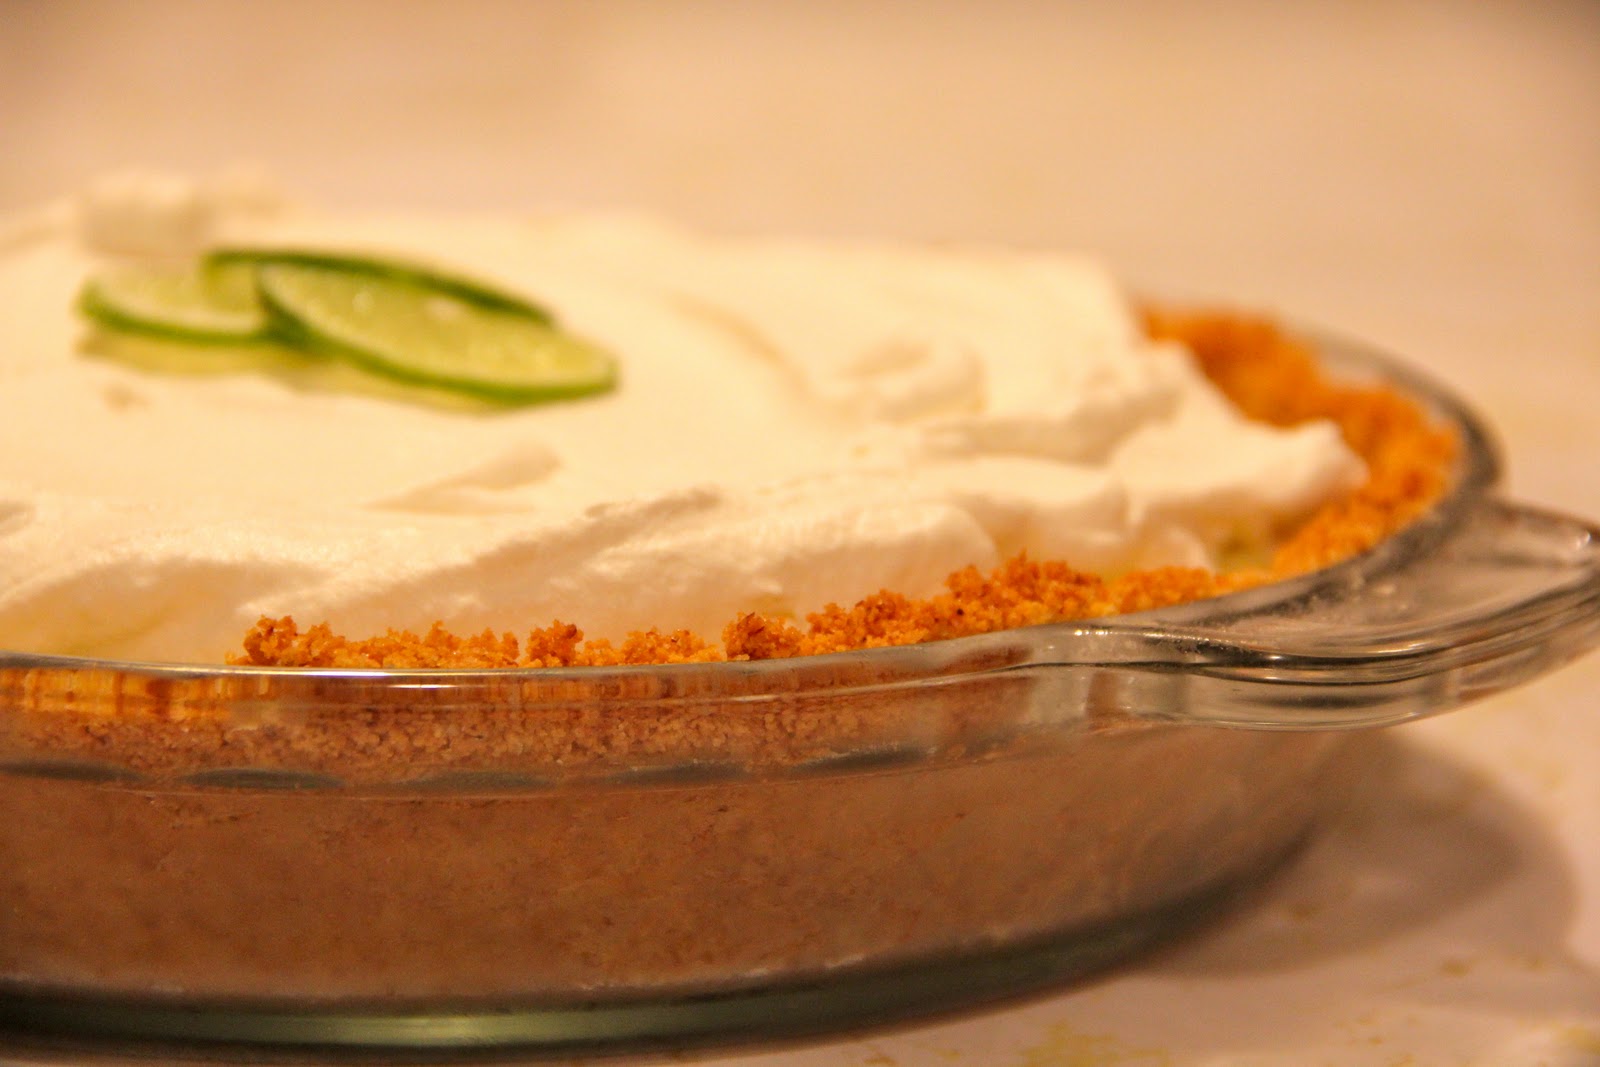
Frozen Key Lime Pie


So I've officially had key lime pie three times this week. Don't judge me, I have a severe case of spring fever and a healthy dose of summery sweets is just what the doctor ordered. That, and a long awaited honeymoon to Maui next week. I highly recommend getting married in September but waiting to take the honeymoon in the most miserable part of winter.

If you like key lime pie, you will absolutely LOVE this frozen variation of the original classic. With only eight ingredients and minimal effort, this simple and delicious dessert is sure to become a regular in your household. If you are worried about a few raw egg yolks, six to be exact, you may want to stop here. However, if you've grown up eating copious amounts of cookie dough and cake batter and order your eggs over easy like me, then prepare for total salivation. A special thanks to Stephany White for introducing this recipe to me!

Ingredients
For the crust:
1 1/2 cups graham cracker crumbs (10 crackers)
1/4 cup sugar
6 tablespoons unsalted butter, melted

For the filling:
6 egg yolks, at room temperature
1/4 cup sugar
1 (14 oz.) can sweetened condensed milk
2 tablespoons lime zest
3/4 cup freshly squeezed lime juice (4-5 large limes)

For the topping:
1 cup (1/2 pint) cold heavy cream
1/4 cup sugar
1/4 teaspoon pure vanilla extract
Lime wedges or slices for garnish

Directions
Preheat the oven to 350 degrees F.
For the crust, combine the graham cracker crumbs, sugar, and butter in a bowl. Press into a 9-inch pie pan, making sure the sides and the bottom are an even thickness. Bake for 10 minutes. Allow to cool completely.

For the filling, beat the egg yolks and sugar on high speed in the bowl of an electric mixer with a paddle attachment for 5 minutes, until thick. With the mixer on medium speed, add the condensed milk, lime zest, and lime juice. Pour over the crust and freeze for about thirty minutes.

For the topping, beat the heavy cream on high speed in the bowl of an electric mixer with a whisk attachment until soft peaks form. Add the sugar and vanilla and beat until firm. Spoon onto the pie and garnish with a few lime wedges or slices. Freeze for several hours or even better, overnight. Serve immediately out of the freezer. The more frozen, the better. I made this at 8pm last night and being the impatient being that I am, had a taste at 10pm. While still wonderful, it wasn't nearly as good as when frozen throughout. Enjoy!


This recipe is the work of my idol, Ina Garten.